There is more to modding your MINI than just performance, sometimes you just want it to look better, more aggressive, whatever. These are some of the exterior mods I have made.

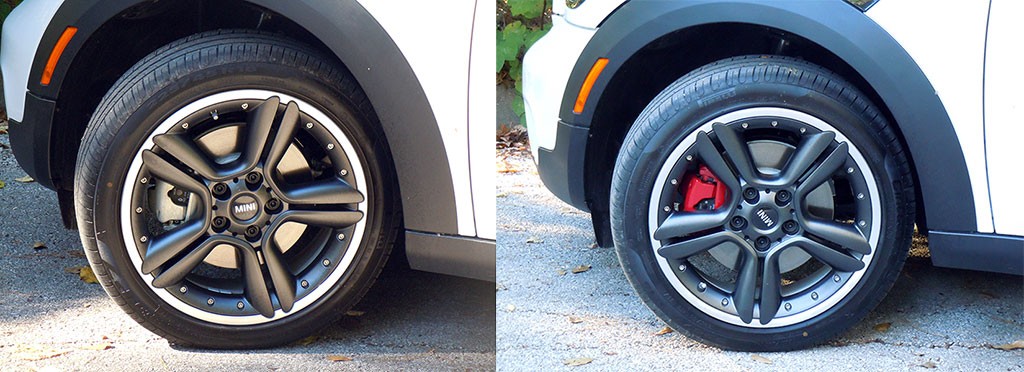
A time consuming but cheap and easy mod is to paint the brake calipers. Only a few of the MINI Coopers out there have red calipers from the factory so I thought this would be neat. I found a brush on bright red caliper paint at my local auto parts store for a reasonable amount. The brush on I felt was better as I did not have to remove the caliper or mask everything off. I simply removed the wheel and started painting. It adds a nice little splash of red to the side view which matches the red in the S on the side scuttles.

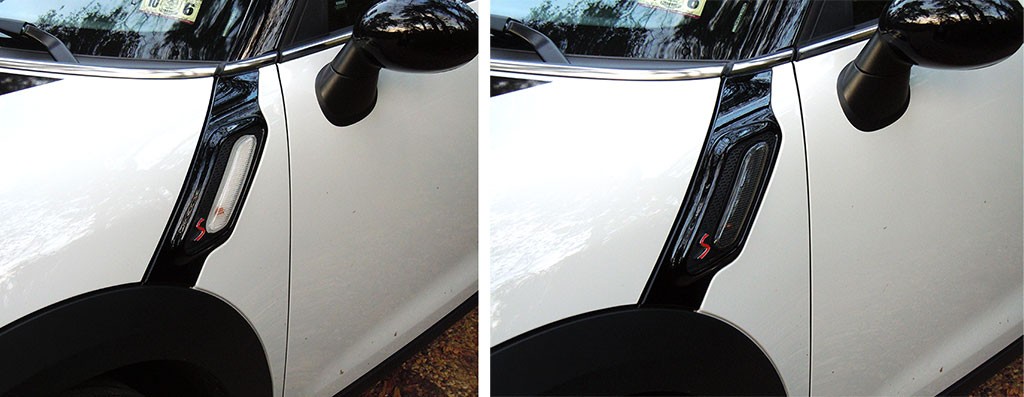
Here I have replaced the side scuttle lights with blacked-out versions. For some reason, this is not commonly done on MINI Coopers. I looked at several different ways to blackout the existing lights but they all looked a little, ummmm, terrible. Sure they looked fine from a distance but up close it was pretty bad. These were available online from several MINI Cooper aftermarket suppliers and used smoked plastic for the cover of the light. It is a complete light assembly ready to clip in (newer versions are LED). I figured for the money I spent on it plus maybe five minutes installing both of them, it was a deal. It looks like it came from MINI Cooper that way even from inches away. Yes, you can still clearly see the blinking light.

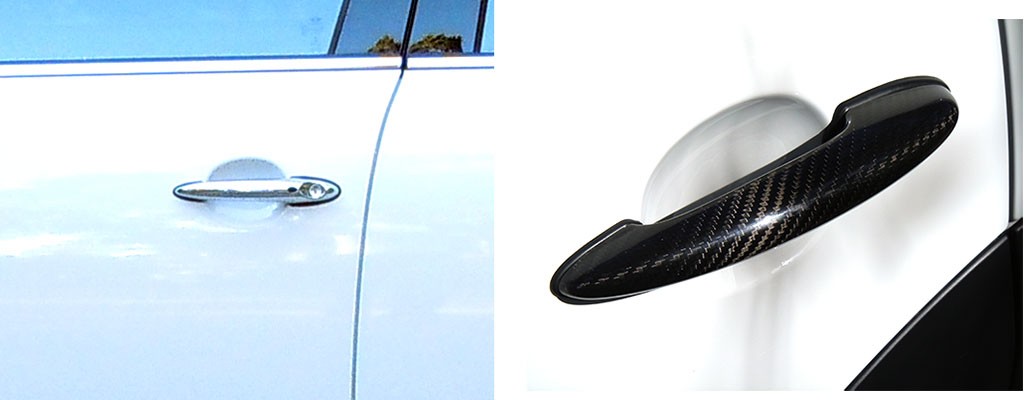
I really did not like the chrome door handles that MINI Coopers have, but unfortunately even with the exterior piano black option kit they only had chrome handles. I looked around and found these carbon fiber covers specifically made for MINI Coopers. These are covers, not stickers, and are actual carbon fiber. They are made in such a way as they “clip” over and “snap” onto the handles. To make sure they do not come off they include some 3M heavy duty double-sided tape. I think they really help complete the blacked-out look.

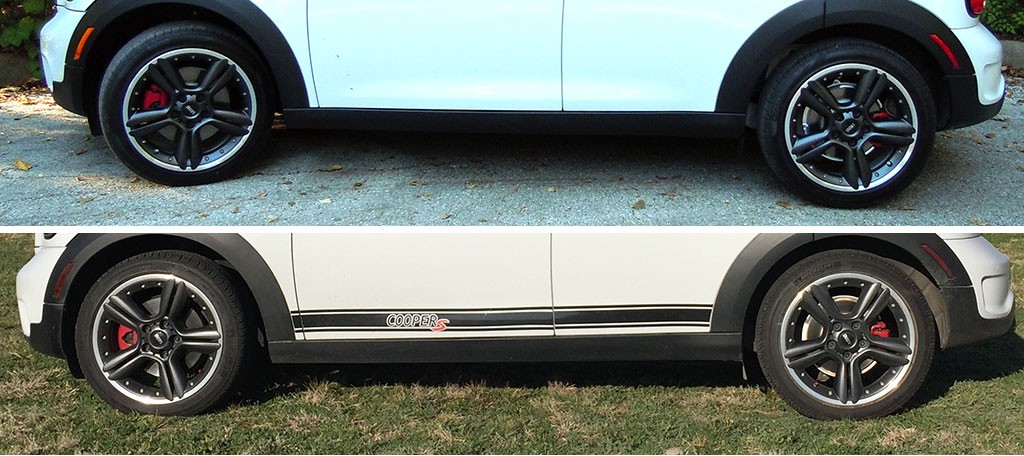
These pictures show two thing; the obvious addition of side stripes and the blackening of the front and rear side reflectors. The stripes were purchased off of eBay (made for the MINI Cooper Countryman) and were the only ones I installed myself. I won’t be doing that again, they look great at a distance. Even with my less than stellar installation I think they really help the side profile look a lot more sporty. Since MINI Coopers do not have a side stripe option from the factory (at least not when I asked), this had to do.
The blackening of the reflectors may not be too obvious but if you look at the orange reflector in the front and red reflector in the rear, both in the black area surrounding the wheel well, you will note that even though the lower picture was shot in brighter light, the reflectors are far darker. This is because I installed some specialized tint tape that was cut to fit over them. These were very cheap and since they were precut, very easy to install. The effect is to keep the wheel well covers all black yet allowing the reflectors to still work at night when light hits them.

One of the more fun things I did (although the installation was not really fun) was installing the undercarriage lighting shown above. I typically run them in purple non-flashing mode as shown in the image (because I believe that is one of the few legal modes/colors in virtually all states/counties/cities) although they can flash, fade, strobe, and do it all in a variety of solid or alternating colors. It is really eye-catching!
Unfortunately it is only really useful at night so it doesn’t do much for all the MINI meets we have during the day.

There are four light strips under the car with multicolored LEDs in them. Those all feed up to a control box mounted in the battery box which is controlled from a handheld radio remote control from inside or outside the vehicle.
I used this AMBOTHER 4Pcs Car LED Neon Undercar Glow light Underglow Atmosphere Decorative Bar Lights Kit Strip from Amazon which ran me about $30. I have to admit I was, and continue to be, impressed with this kit for $30.
For $30 and an afternoon of work I have gotten a lot of compliments off of this and would not hesitate to buy another one should this one fail. I have as of this writing had this for a year without a single issue.

In the picture above you can see I have replaced the wheels going from the very nice 18″ dual-tone factory rims to the new all-black 18″ wheels. Other than looks, the differences are:
- Lighter weight – Rotational weight is much more important than non-rotational like groceries in the boot. Less rotational weight means faster acceleration.
- Wider wheels – These wheels are 1/2″ wider than the factory ones allowing me to switch from 225/50R18 over to 245/45R18 tires. This puts more rubber on the road (1/2″ more tread width per tire, 1″ on the front and 1″ on the rear) which helps me stay in the curves at higher speeds. The increased size of the tire adds weight but that is balanced out by the lighter wheels. The wider tires also seem to ride smoother which helps since the suspension is stiffer than the factory setup.
- Wider offset – These wheels stick out further, about 1/2″, giving me a wider stance and more aggressive look. Couple this wider stance with more rubber on the road and you have a cornering machine.

