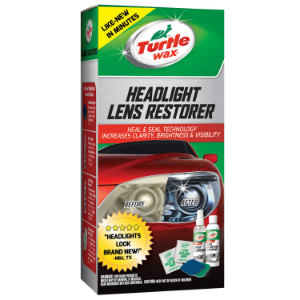
The Turtle Wax T-240KT Headlight Lens Restorer Kit was purchased as a result of a plea by my wife to try and fix her headlights. While her 2009 MINI Lola is in pretty good shape, the headlights are dull and yellow.
I have tried several Headlight Lens Restorer kits in the past which always fail to live up to expectations. I am pretty sure I tried every headlight restoration kit autozone offers. I have also had two different companies attempt headlight restorations, which also did not go as advertised. I did not expect this to go any better.
So why even try? Because the replacement lights for this car are somewhere around $1,200 each so I am not about to replace them unless I have absolutely no choice.
I did a little research and read a lot of headlight restoration reviews. The 3m headlight restoration kit was popular, as was the sylvania headlight restoration kit. The rustoleum headlight restoration kit reviews looked promising, and then I found the Turtle Wax kit and it seemed very positive so I ordered one.
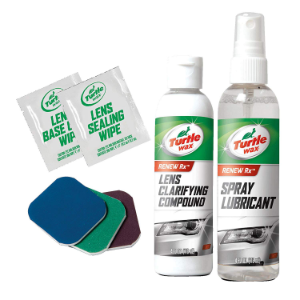
The Turtle Wax T-240KT Headlight Lens Restorer Kit contains three sanding disks with a different grit on each side. These are used to get serious problems out of the plastic. They are wet sanding disks and a bottle of lubricant is included. This was the most difficult part of the process and probably the part that I did not do as much as I should have. One tip, do not bend the pads as this tends to make them fall apart rapidly near the bend.
For whatever reason, there is a jagged area that crosses the lens about 2/3 of the way up from the bottom in roughly the same spot on both lights. This area divides the top portion where it was the most damaged from the bottom portion that was still in good shape. My best guess is that there is a coating over the outside of the lens and this area is where the coating is coming off with the area above it has no coating. Hopefully, the Headlight Lens Restorer kit will help minimize this line.
Once the lens was sanded as smooth as I thought it should be (and in hindsight, I should have done more), the next step is to apply their polish included in the headlight lens restorer kit to the lens. They say this can be done by hand or by a buffer at 1,500 rpm. Let me just say it will take a while with a buffer so I would not even think about doing it by hand.
Since I did not have a buffer I had to buy one. From the suggestions in the kit and a little reading online I needed one that was a random orbital buffer, one that would do 1,500 rpm (faster might melt the plastic, slower would take substantially longer to complete the job), and lastly, I wanted one that did not break the bank as I had never had a reason to buy one of these in the last 30+ years of owning a car so I wasn’t sure how much use I would have for it.
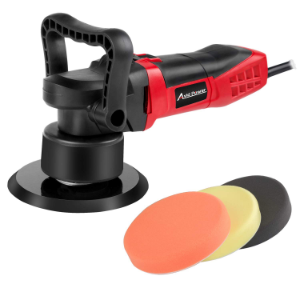
The one I selected was the Avid Power Polisher, 6-inch Dual Action Random Orbital Car Buffer AEP127 which I picked up from Amazon for about $70. I figured a polisher had to make the headlight lens restorer kit work better than just some of my aging elbow grease. I have a separate review for it here. To make a long story about it short, I am very happy with my purchase.
Once the buffing is done, you then apply a two-step sealant to help keep the lens looking good.
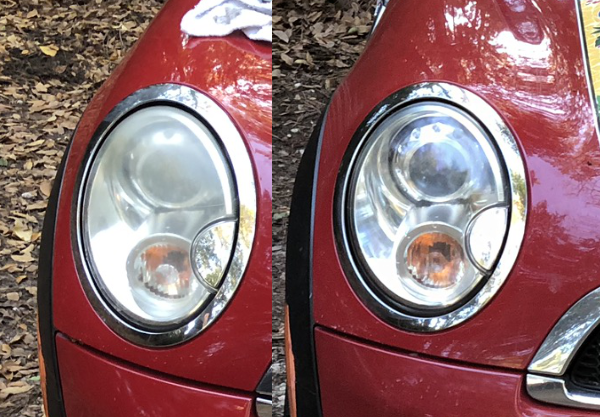
So how did it work? I can honestly say that this is the best Headlight Lens Restorer job I have ever seen. Do they look new? No, not at all. But they look amazing considering how they looked before and even disregarding that, for a 2009 model car they are awesome. In the image above you can see they are a LOT less hazy. These things never turn out as good as the box or product images show, but in this case, it absolutely was close enough.
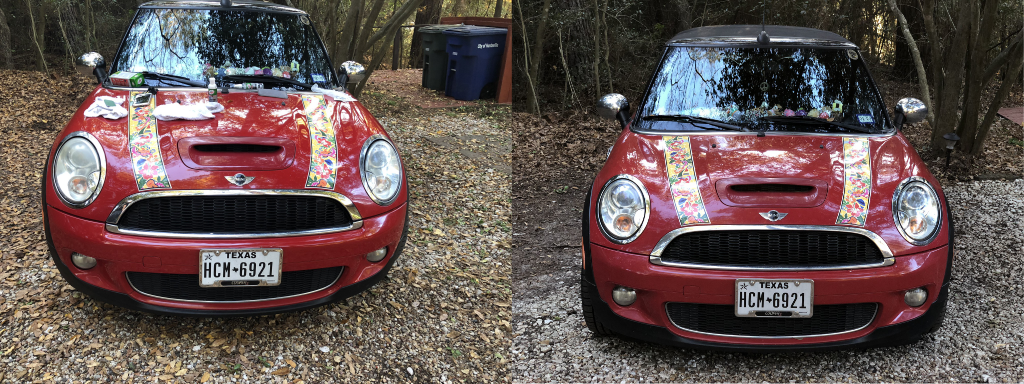
And here you can see the improvement of the headlight lens restorer kit at a distance. The improvement is fantastic not just close up but improves the overall look of the vehicle at a distance as well. I would say that is well worth the time, effort, and money for this job.
Now that I have done this, I am almost looking forward to doing it again so I can apply what I learned this time. Basically I will go slower and spend at least twice as much time using the sanding pads included in the headlight lens restorer kit to get the surface as smooth as humanly possible before moving on to the polishing and sealing phase.
I fully expect this to degrade over time, just like new headlights do. The question on my mind is how long the results from the headlight lens restorer kit last. If it is a few months, maybe I need to find another solution. If it is a year or so, then this will be a pretty awesome afternoon repair job.
How do they last? Check back and I will let you know.
So far, the Turtle Wax T-240KT Headlight Lens Restoration Kit gets five stars.
Three-month update:
So it has been three months and I thought I would take a look at how the headlights looked this far along, and I have to say, I can not tell if they have gotten any worse. That, to me, is an excellent thing. We have had a lot of bad weather and we took Lola up to Eureka Springs for Christmas, all without any noticeable degradation of the headlight lenses. At this rate, I would say the time, effort, and expense of the headlight lens restorer kit are absolutely worth it and it is indeed the best headlight restoration kit I have ever tried.
I hope you enjoy enjoyed my review of the Turtle Wax Headlight Lens Restorer Kit!